
Quick Retro Kitchen Tile Upgrade

Retro Vibes
Quick, Easy, Inexpensive Tile Upgrade!
We bought our house 6 years ago.
I’ve always loved our little home!
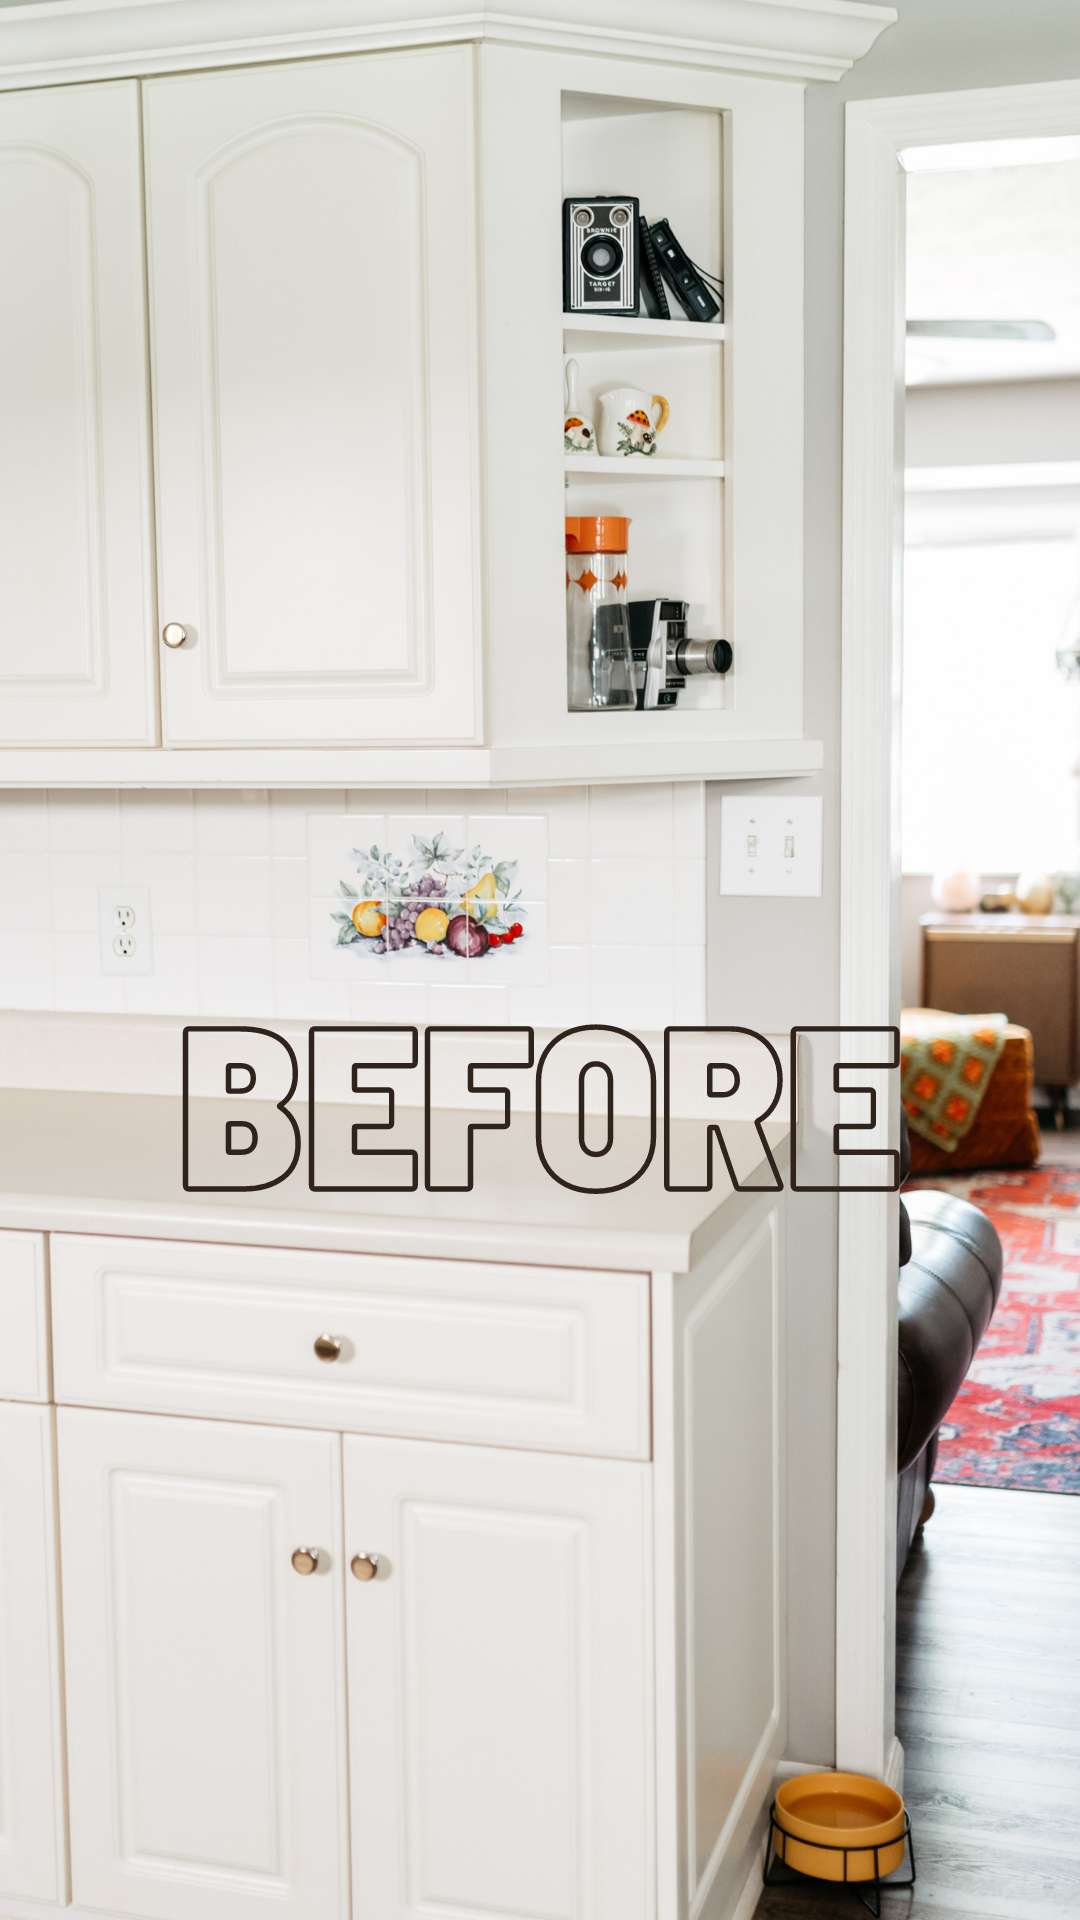
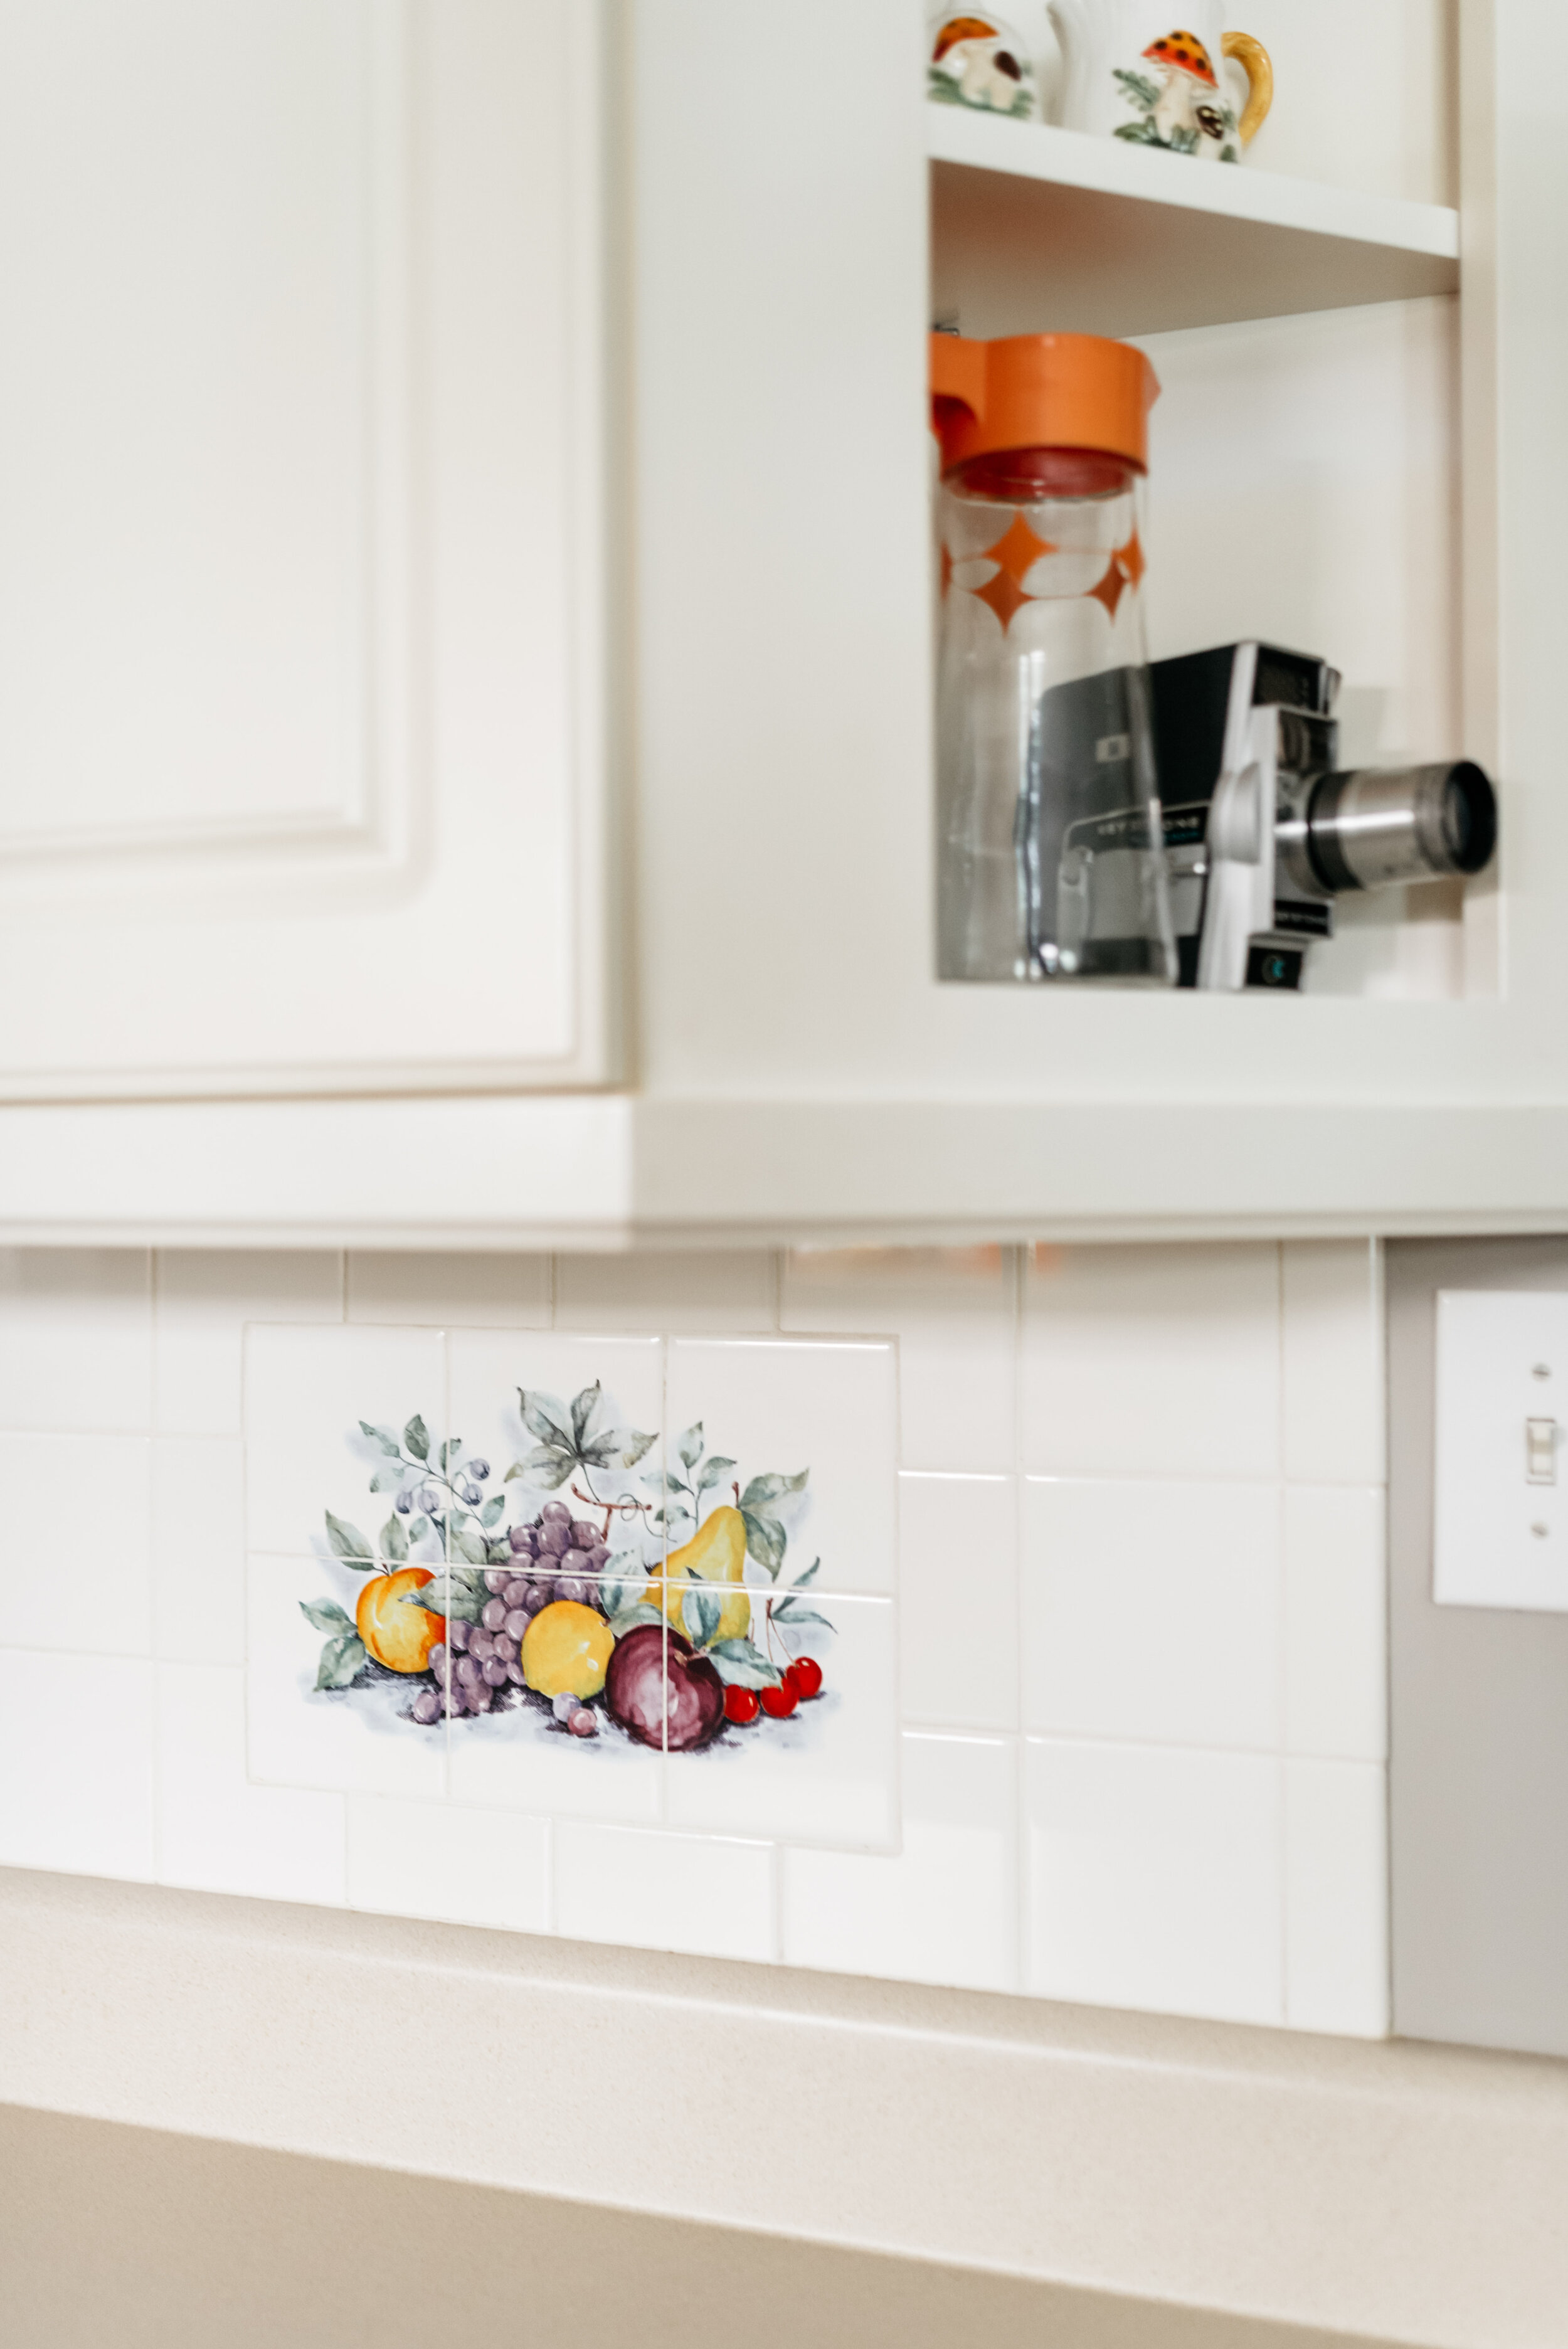
But I’ve also always hated that dang assorted fruit design on our kitchen tile.
We were so blessed that our house had no true structural renovations that needed to be done when we purchased it. The previous owner was a clean freak, so the house itself was pristine. (Sometimes I’m scared she’s going to pop-in unexpectedly and be horrified by the dog hair that floats around our house. Let’s just hope that never happens though.)
The only changes we made before we got married and moved in was painting all of the interior walls.
Slowly over the years since then we’ve updated the flooring in the kitchen, living room & bathrooms; we painted the exterior brick; updated the landscaping; and various other small changes like bathroom light fixtures. But we’re just not the ones to go into a full on demolition and rebuild project.
So for the last 6 years, that cheesy painting of fruit from circa 1998 has been haunting me.
Re-tiling the whole kitchen could get pricey and a big hassle.
I considered painting over the tile, but have just never been able to go for it just in case it turns into a big mess that can’t be fixed without completely starting over.
So I finally found a quick, easy, inexpensive solution to my ugly tile problem.
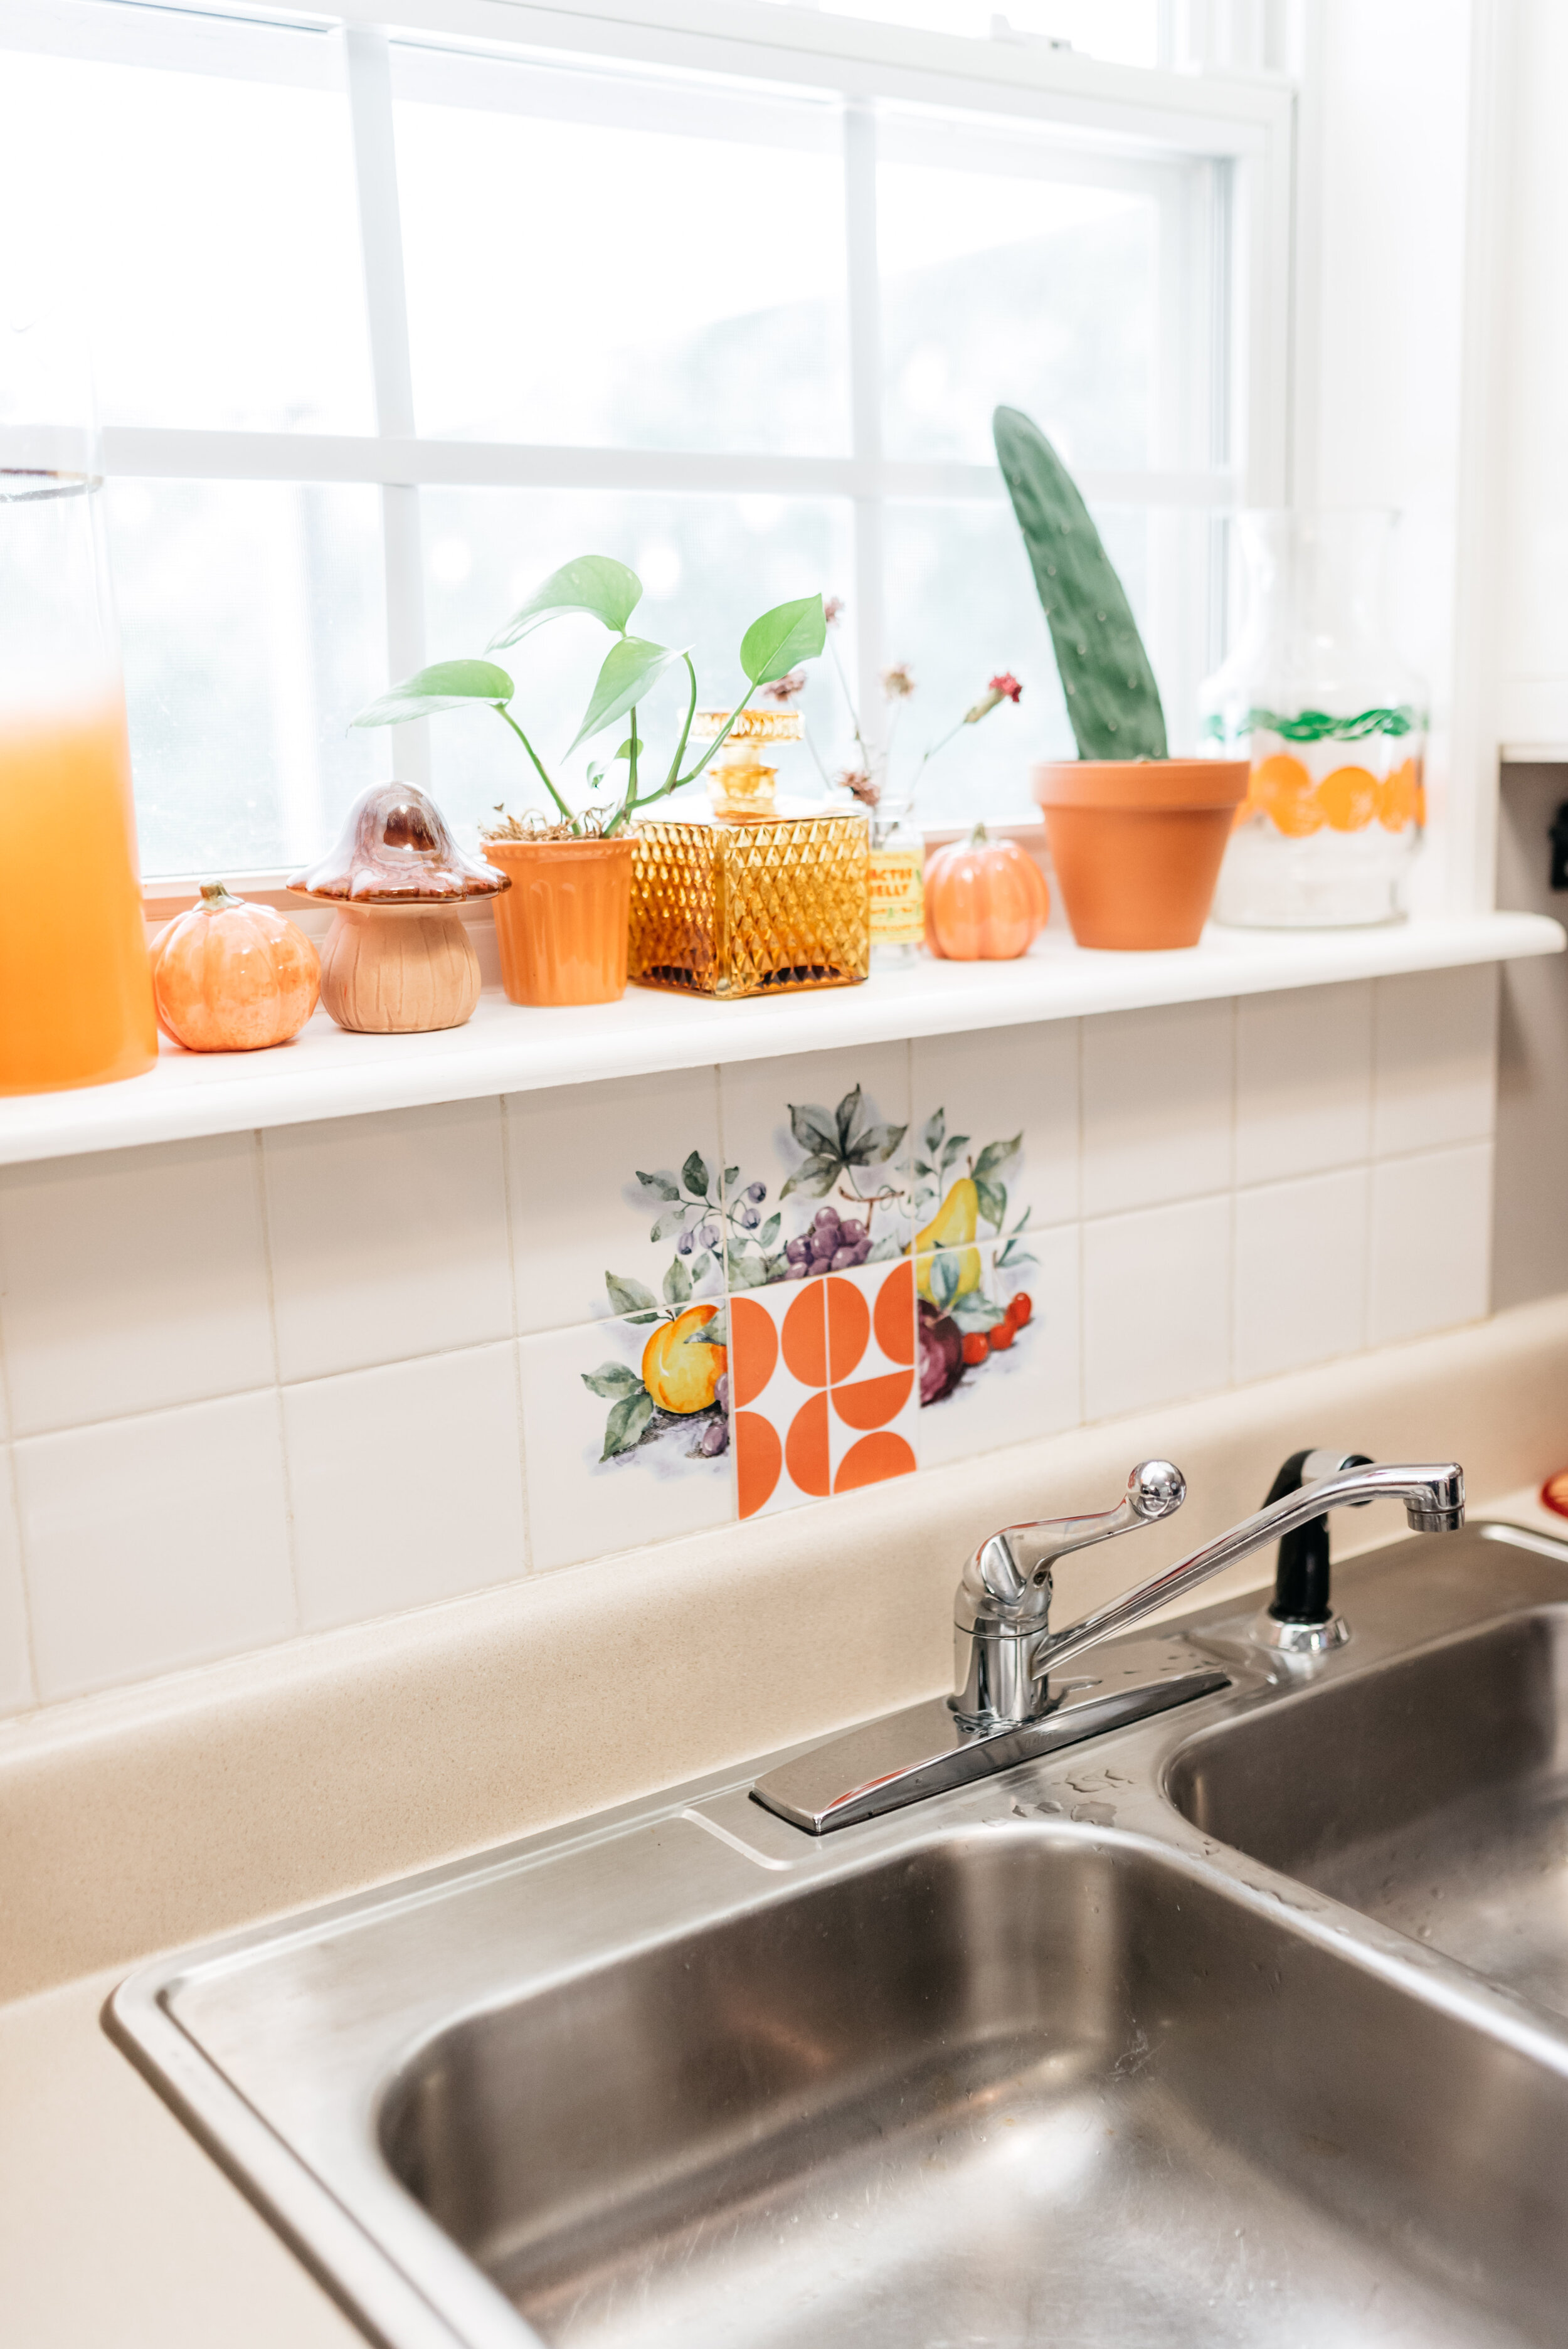
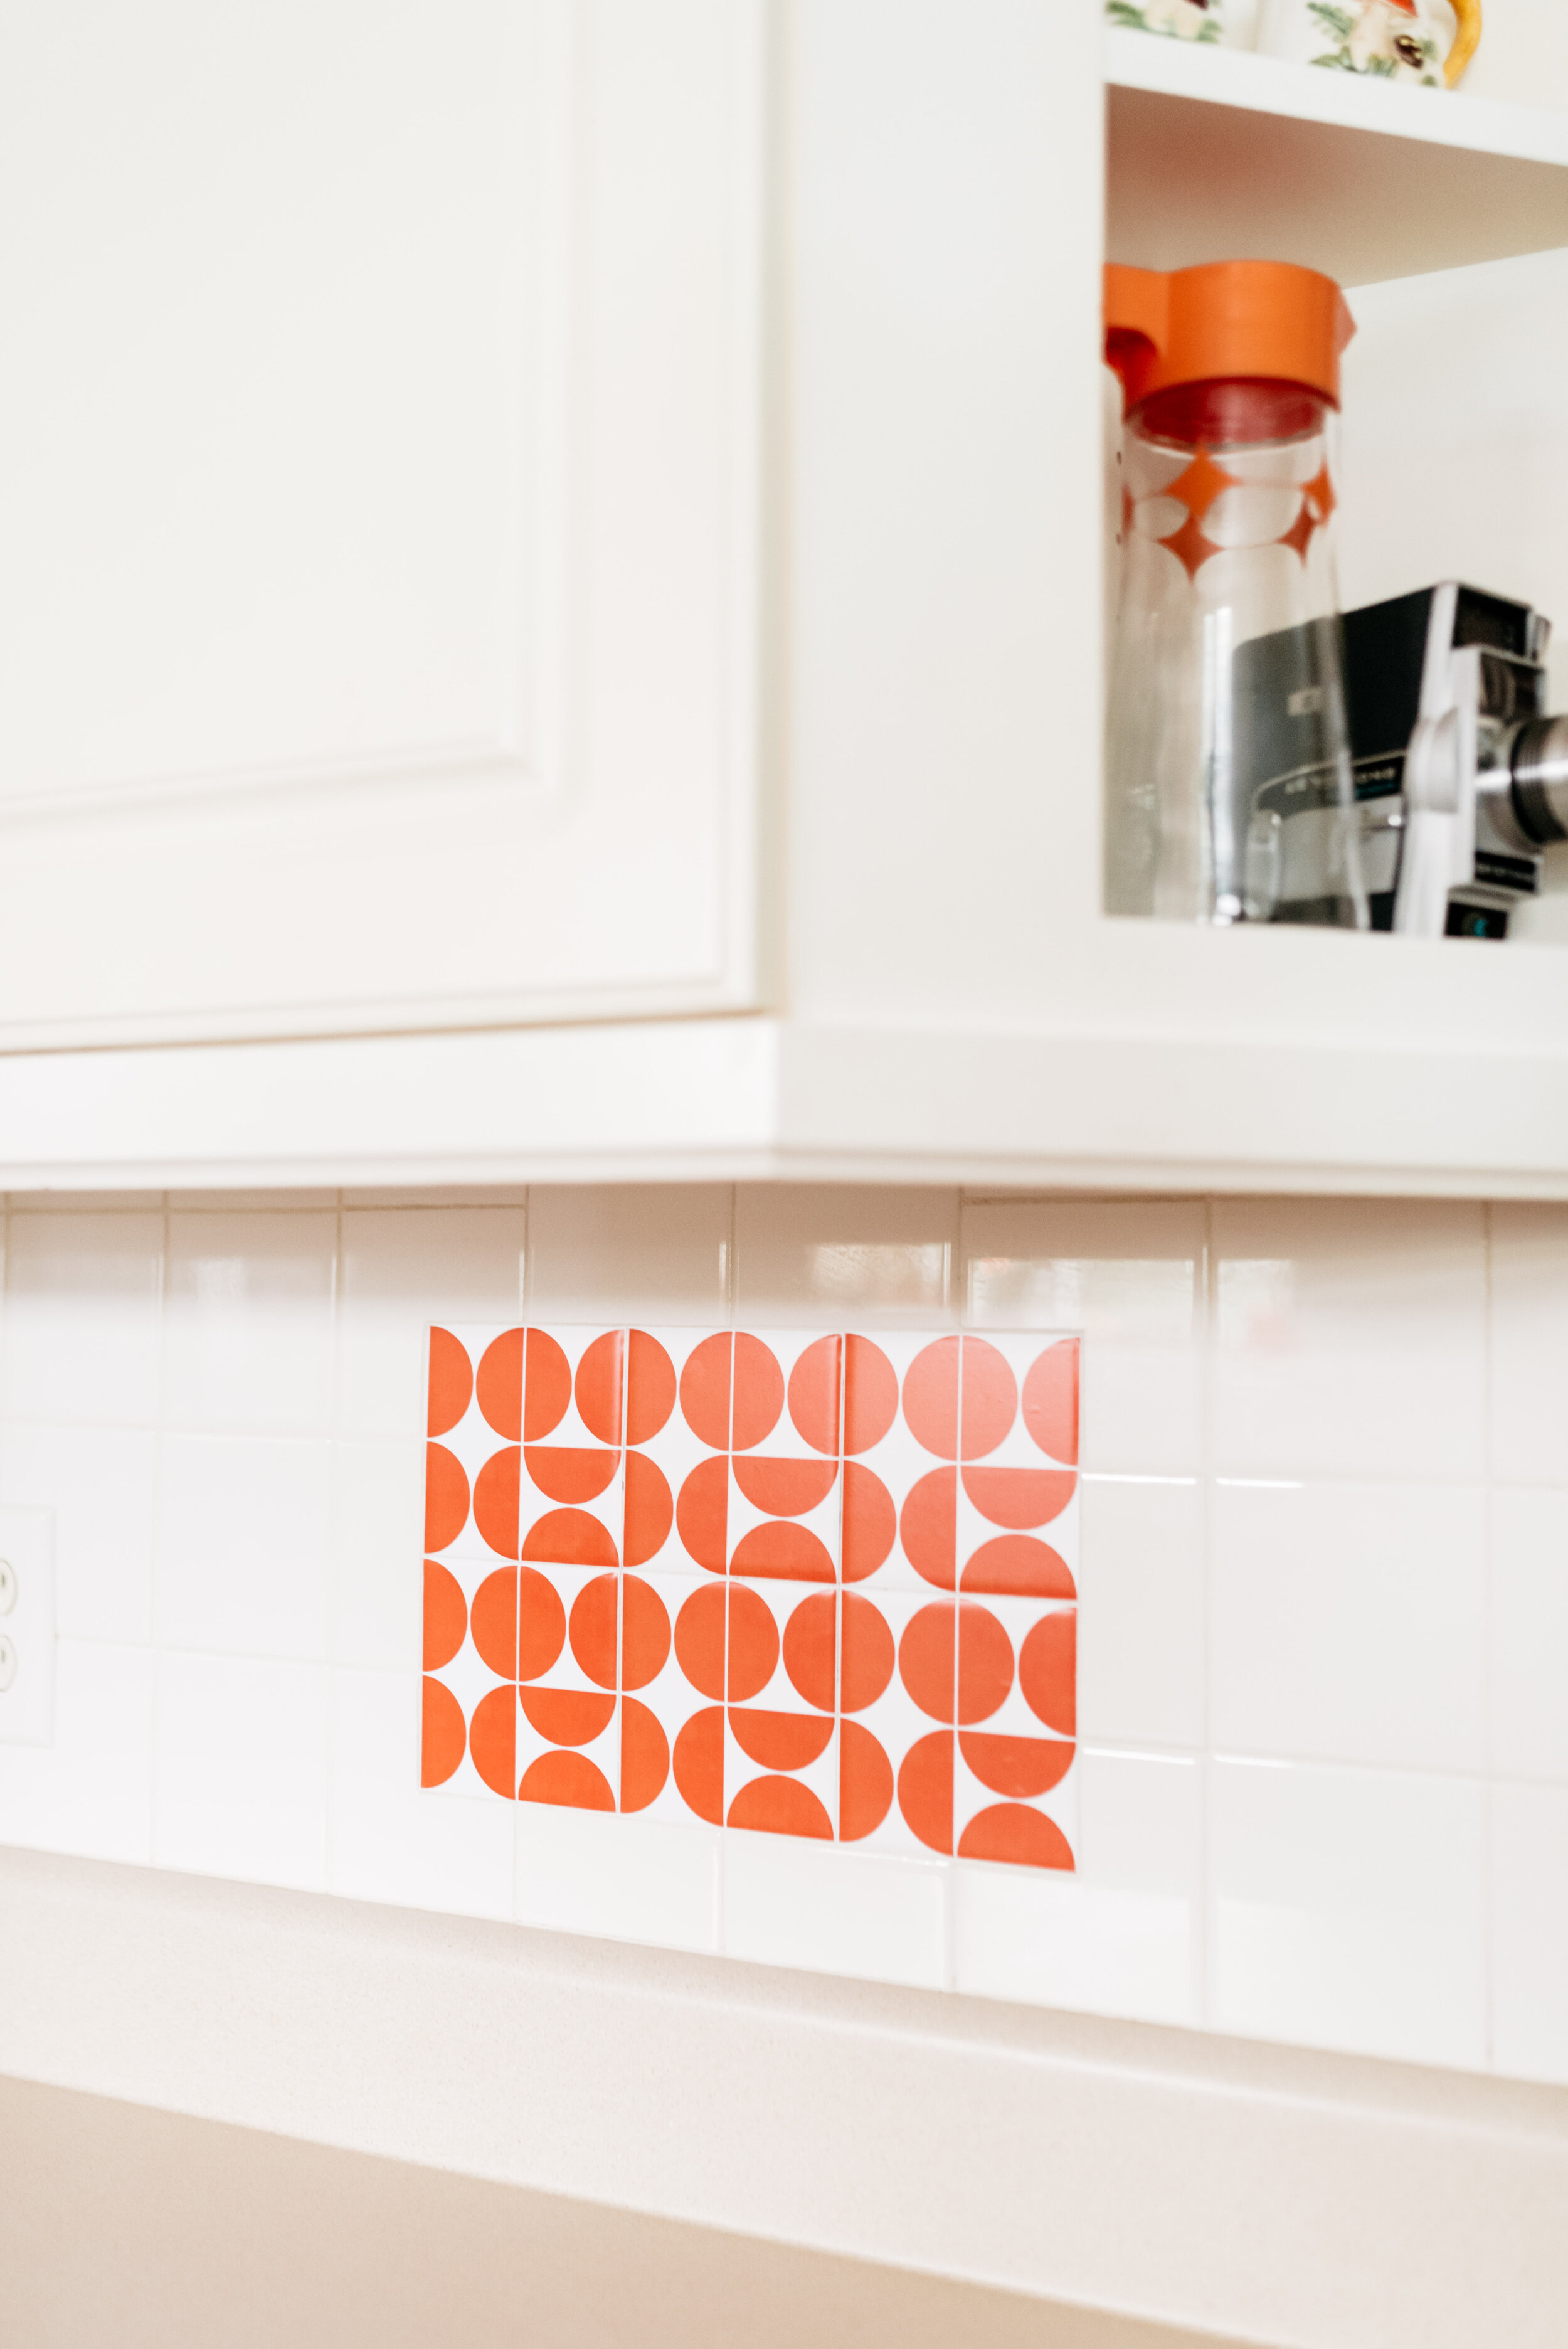
TILE STICKERS.
I never even knew this was an option! I ordered these amazing vinyl tile stickers from Etsy for $19 and I am in LOVE.

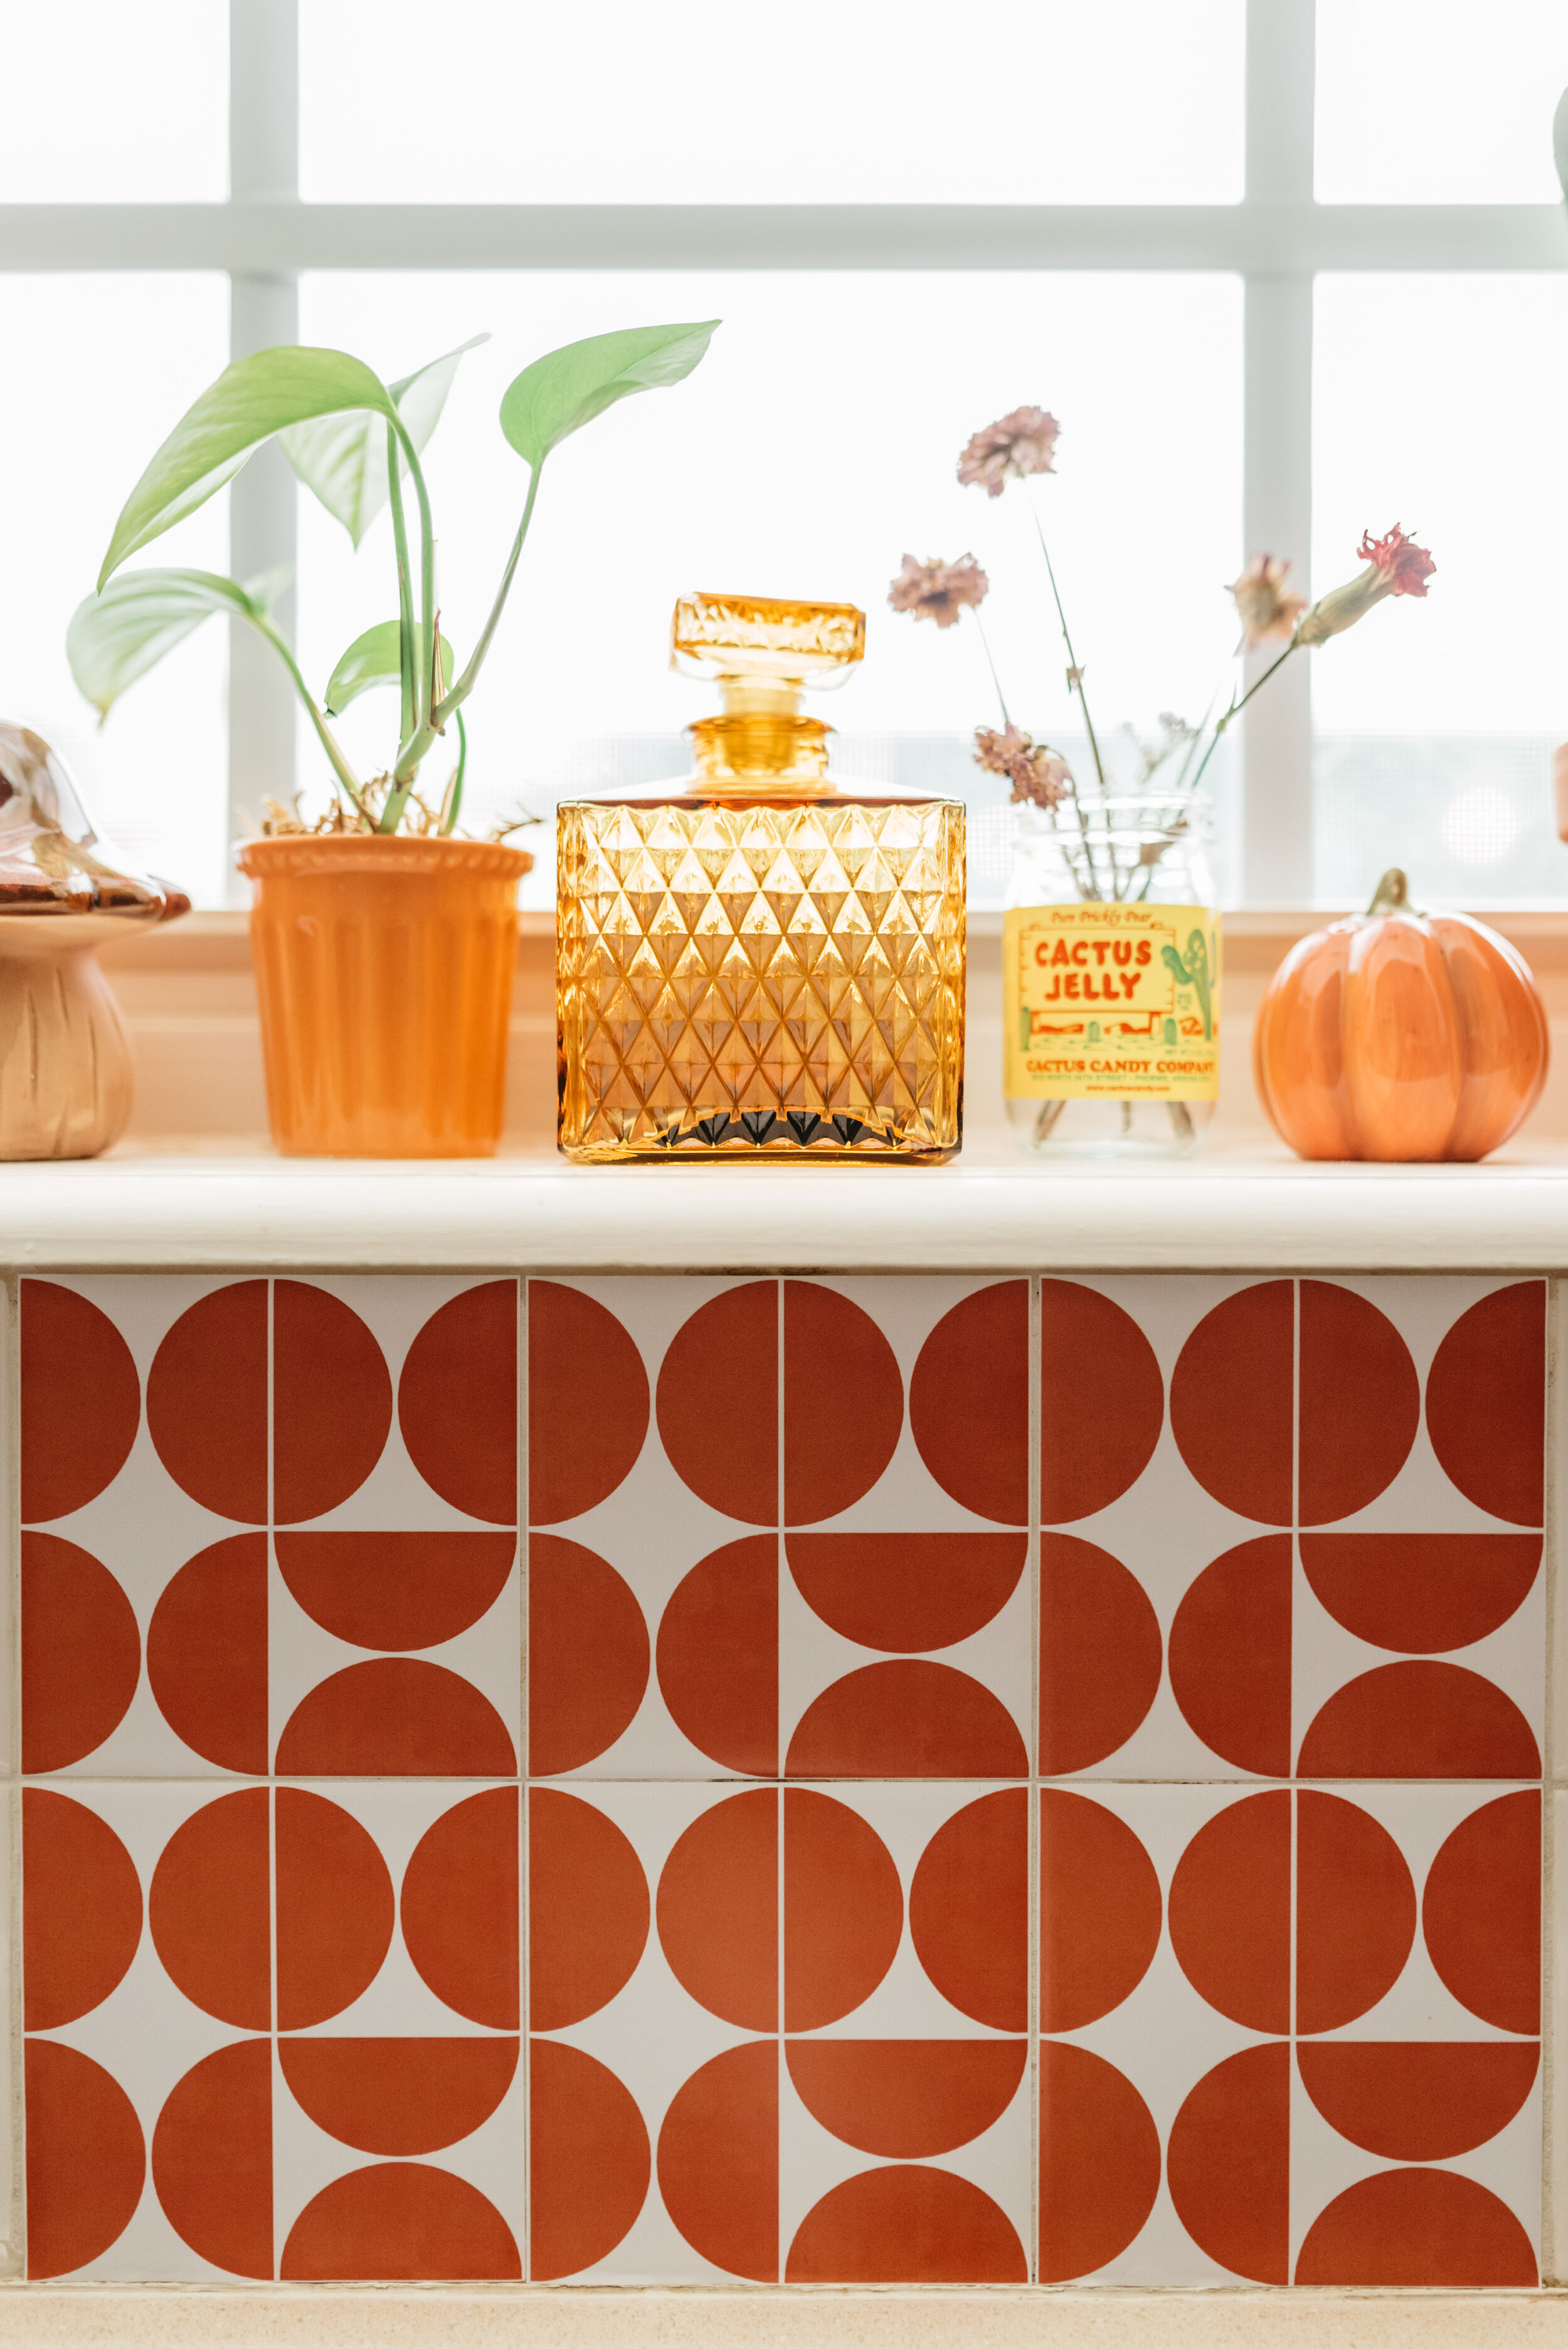
Let me take a second to say, I never actually set out to be a person who’s obsessed with the color orange. I really do like other colors. But for some reason I cannot stop myself from buying orange home decor. Okay, that’s all.
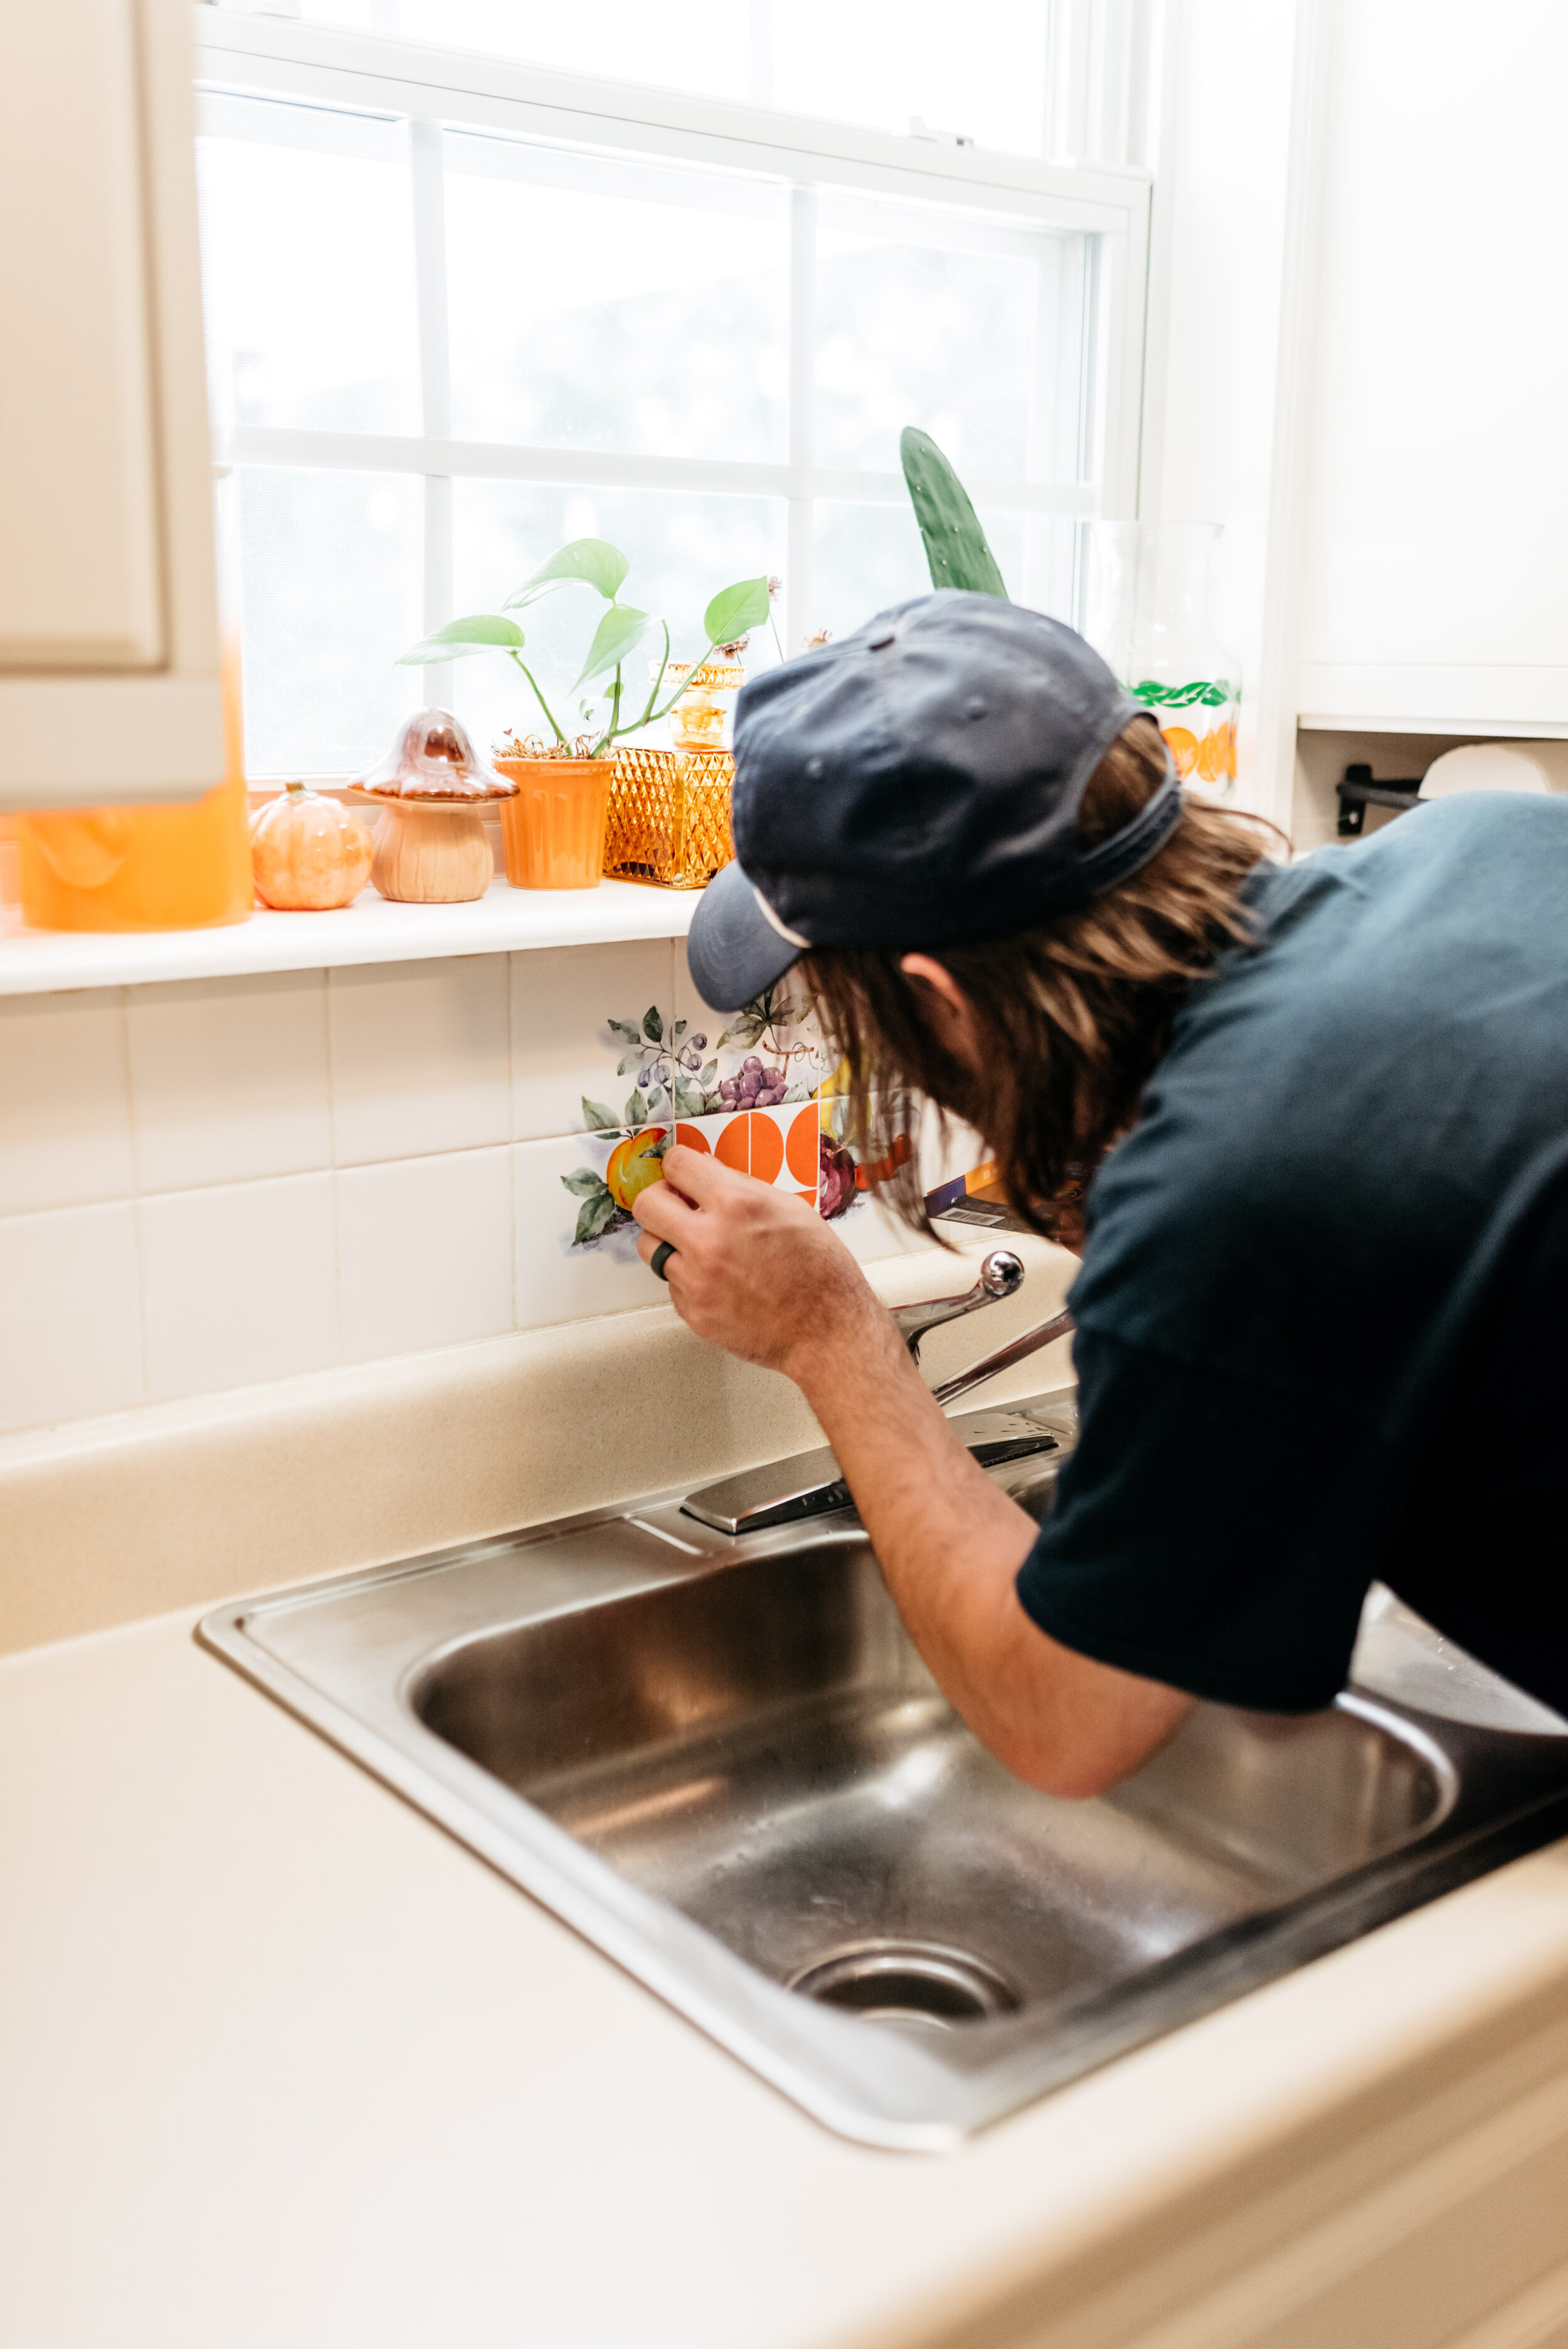
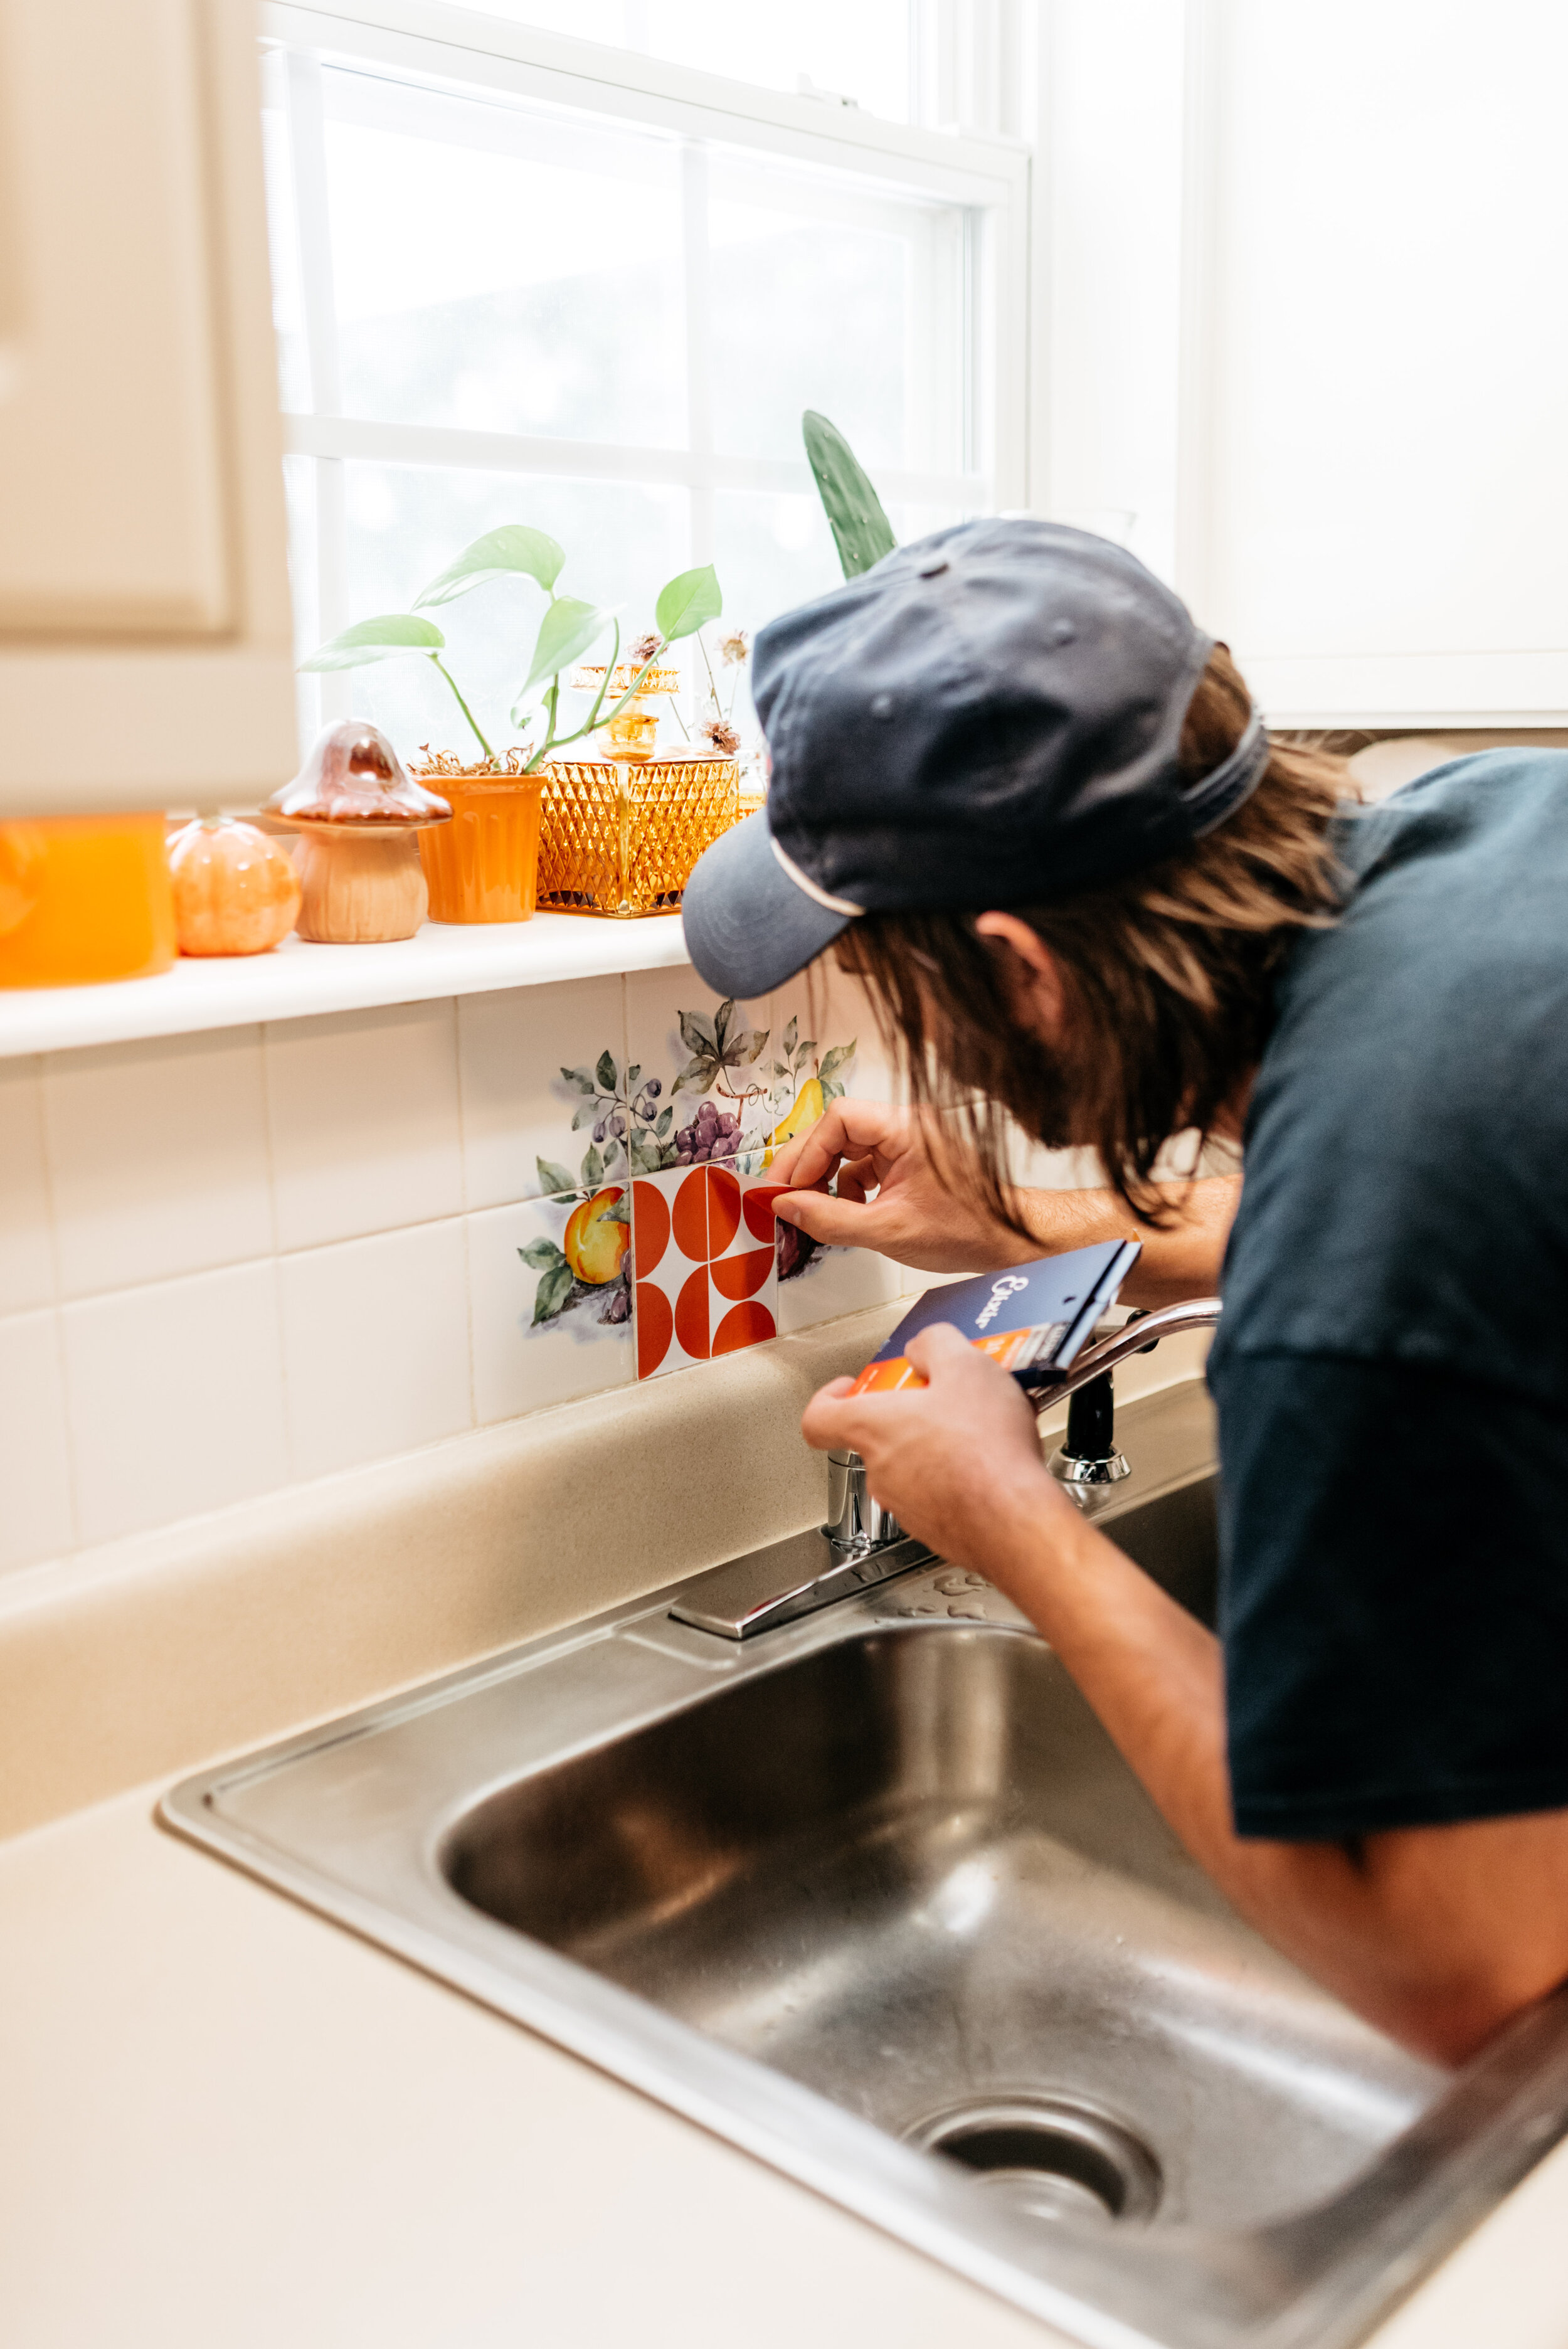
Now, these stickers were super easy for me to apply, because I didn’t do it. I had Josh apply them because I already know my hands are too shaky to get things perfectly straight haha! All you have to do is thoroughly clean the tiles, dry them, and then literally peel & stick the vinyl stickers as smoothly as possible.
It took him around an hour to carefully apply all 18 stickers. They came in packs of 10, so we had 20 total. We used all 20 because he had a couple of hiccups, but it all worked out in the end! And I am truly IN LOVE with the results!!!

I’m linking a few designs from the Etsy seller that I personally love here:

Here’s a link to the over 200 designs they have available! This Etsy shop is seriously amazing.
KEY POINTS:
We’ve only had these up for a few days (9/5/21), so I can’t yet speak to the longevity of the stickers, but so far I am very pleased!
Do not use a hair dryer! It is suggested to use heat to apply the tile stickers, but Josh did not have good luck with that method.
Thoroughly wash and dry the surface before applying.
Make sure you order the correct size tile stickers. Ours are the 4.25 squares and they fit perfectly!
Order a few extra than the exact amount that you need, in case you have a few mess-ups.
If you’re looking for an inexpensive fix to cover your unattractive kitchen or bathroom tile, you should consider giving these stickers a try! If you don’t like the result, they’re made to easily peel off! (We haven’t had to remove ours, so hopefully that statement stands true when the time comes!)
TOTAL COST:
2 Packs of Tile Stickers: $19.00
Shipping: $12.40
Tax: $2.52
TOTAL: $33.91
Not too bad if ya ask me :)
(Clearly I was not paid to create this post, just wanted to share my own little home decor win!)
Let me know if you have any questions or if you try these tile stickers for yourself!!!
